The NS3 is a network simulator with a steep learning curve, I’m currently learning how to use NS3 and I thought that I’d write about the things that I learn since the number of people writing about NS3 seems very little.
A simple start
 )
to start, we will be making a simple Local Area Network (LAN), basically three devices connected to each other by cable, then to test the design, we will have one of the devices send a UDP echo to another device and have the results logged to the terminal.
)
to start, we will be making a simple Local Area Network (LAN), basically three devices connected to each other by cable, then to test the design, we will have one of the devices send a UDP echo to another device and have the results logged to the terminal.
n1—-n2— -n3
| |
echo echo
server client
NS3 uses C++, so here is the boilerplate of the basic application:
add the following code to setup the time resolution and enable terminal logging:
to start our design, we need to create nodes, in NS3, nodes are an empty place holder , we can add our devices into these nodes and turn them into anything from PCs to routers, so let’s create three nodes:
NodeContainer is a function that helps us create nodes, you pass a variable and then inside the function you specify how many nodes you want to create in that variable.
next, we need to specify what type of network topology we are creating, we can create LANs, P2P networks, WiFi networks … etc, for now lets create a LAN and setup its attributes such as bit-rate:
CsmaHelper is another function that NS3 gives us, we use it to setup the attributes of a LAN network, the function takes a variable that stands in place of a LAN network, so if you can create multiple LANs that have different attributes by assigning a different variable to each.
now that we have a network and a bunch of useless nodes, we need to add the useless nodes to the network we just created
Again, the function above works the same way as the other functions so far, you give it a variable, then inside this variable you install the nodes into the network that we created, but… these nodes are useless, they are like new PC, you need to install software on them to make them work, lets do that:
We install the internet stack on our nodes, stack means things like the IP protocol and physical layer protocols … etc, now that our nodes work, lets give them IP addresses:
Ipv4AddressHelper is yet another function provided by NS3, we give it a variable (address) and inside it we create an IP scheme, then using the Ipv4InterfaceContainer function we assign those IP addresses on our devices and save the new devices in a variable called interfaces.
Congrats 🎉🎉🎉,
the network is finished ✌, let us now do some simulating, after all, this is what NS3 is for 💩
We need to install the UDP-Echo client app on one device, and UDP-Echo server app on another and then simply have the client send an echo to the server:
The first line simply assigns port number (9) to the server:
UdpEchoServerHelper echoServer (9);
The second uses the ApplicationContainer function to install install the server on node number (0):
ApplicationContainer serverApps = echoServer.Install (nodes.Get (0));
The other lines start and stop the server at certain times.
Let us now install the Echo client on node number (2):
The first function takes as arguments the destination node and the server’s port:
UdpEchoClientHelper echoClient (interfaces.GetAddress (0), 9);
Then we go on and setup some attributes as desired, after that we use the ApplicationContainer function to install the client app on node number (2)
Add the following code to start/stop the simulator:
Your final app should look like this:
Now to run the code 🤓
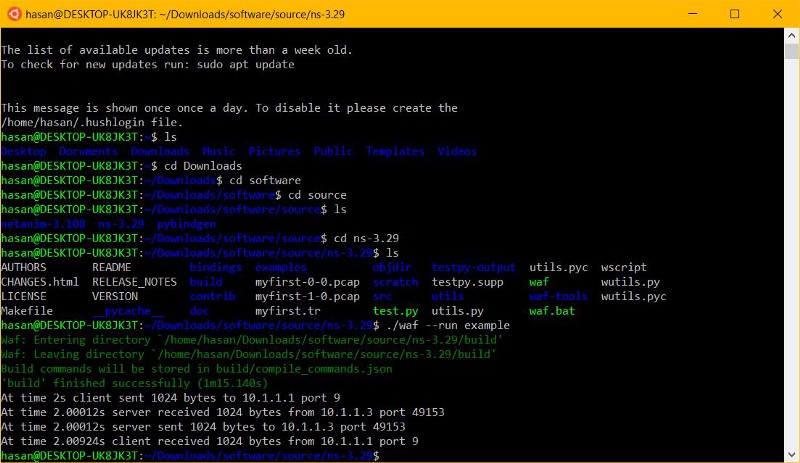
Open your NS3 installation directory, then go to source folder, inside you will find a folder named ns-3.29 inside it find the folder named scratch and copy your your entire application into it (save your app with a name of your choice such as net.cc) now go back to the ns-3.29 and open a terminal there, run the app by typing
/waf –run scratch/net
 )
)